One of the most popular features of QuickBooks is Point Of Sale (POS) that allows its users to manage their items and inventories in one place. QuickBooks POS Error 176103 has three basic subscriptions for various businesses. Each business can pick their preferred subscription, i.e., the basic subscription for $1200, Pro subscription for $1700, and the multi-store for $1900.
However, despite being popular, QuickBooks POS can face some technical glitches in the shape of QuickBooks errors, such as QuickBooks Point Of Sale Error 176103.
Through this article’s medium, let us discuss the causes and the solutions of QuickBooks Point Of Sale Error 176103.
Let’s discuss the reasons first:
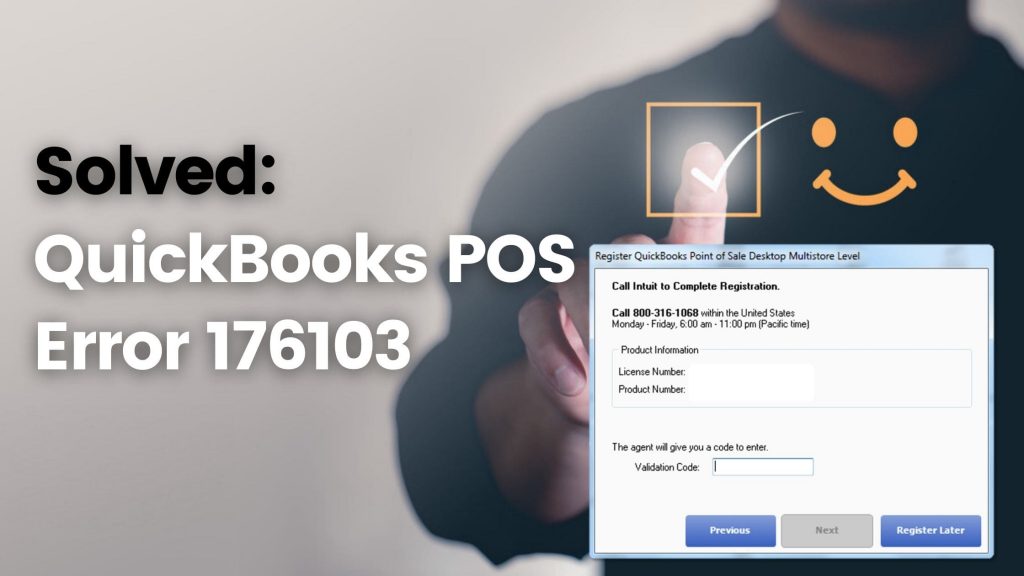
What is QuickBooks Point of Sale Error 176103
QuickBooks Point of Sale Error 176103 is an error code that may occur when trying to activate QuickBooks Point of Sale software. This error typically indicates an issue with the product number or the validation code used during the activation process. When the activation process encounters an incorrect or invalid product number or validation code, it triggers the Error 176103.
Why Do You See QuickBooks Point Of Sale Error 176103?
When there are some damaged components and QuickBooks POS can not validate the license, you will end up seeing QuickBooks POS error 176103.
What Are The Cause Of QuickBooks Point of Sale Error 176103?
- If you have entered an invalid code in the Point Of Sale, you will see QuickBooks POS Error 176103.
- Another reason can include incorrect date and time on your Point Of Sale Computer because of the weak CMOS battery.
- If you have not inserted the previous version of the installation disk while restoring QuickBooks POS, it can cause you QuickBooks POS error code 176103.
- The situation where the entered license number is wrong can make you see QuickBooks Point Of Sale Error 176103.
- If there is a damaged QuickBooks POS datastore file, you are most likely to see this issue.
How to Fix QuickBooks Point of Sale Error 176103
To resolve this error you can follow the below given troubleshooting steps. However, you can consult with our QuickBooks error resolutions team to get instant help.
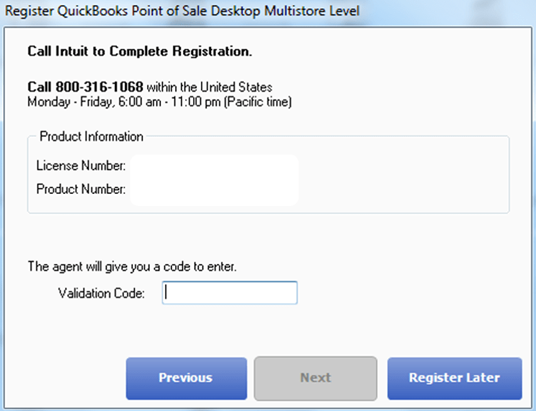
1 Solution: Correct Validation Code
Ensure you do not enter hyphens, underscores, and spaces while entering the validation code, as none of them are permitted.
2 Solution: Make Sure Your System Has the Accurate Date and Time
- If your system has an incorrect date and time, make sure you change that to accurate.
- Go to the control panel and choose Date and Time to modify your system’s date and time.
- Update the date and time of your Point Of Sale.
3 Solution: Clear the Entitlement Folder of QuickBooks
- Access the entitlement folder of Intuit
- Press Ctrl+A to select and hit the delete button on your keyboard, or you can also press Shift+Del.
- Shut each program and save every unsaved work, then you have to restart the system.
- Open QuickBooks Point Of Sale and replicate the registration process; see if that works for you.
If this issue still exists, we recommend trying solution two once more.
Read this article > QuickBooks Point of Sale Error 175305
4 Solution: Uninstall and Reinstall QuickBooks Point of Sale
Procedural Instructions for QuickBooks Point Of Sale Clean Install
- The first step is to create a POS data file backup.
- Download the QuickBooks Desktop Point Of Sale’s copy, or you can also keep the installation media with you.
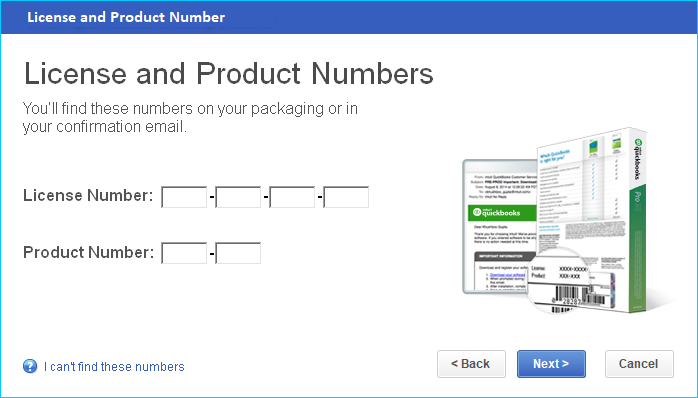
- Note your QuickBooks license and product code.
- Do not forget your windows updation and keeping windows credentials handy.
- Ensure there is no other active program in your system, and feel free to start it as per your wish.
This is How You Reinstall QuickBooks Point of Sale
Follow the given steps install QuickBooks Point of Sale:
Step 1: Uninstall your QuickBooks POS
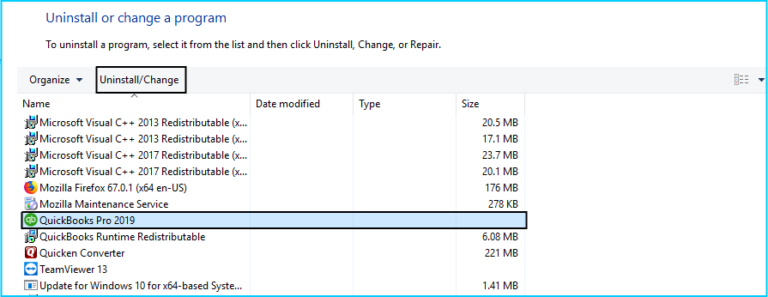
- Open the programs and features within the control panel of your windows.
- Go through the installed programs list and pick QuickBooks Point Of Sale 1×0, then choose the “uninstall” option.
- The wizard prompt will show up on your screen, and you have to follow the procedure to finish the process.
Step 2: Delete or Rename the QuickBooks Point of Sale Manually
Note the folder name and the location to alter their name. XX represents the QuickBooks Point Of Sale Version. To rename the existing folder, select it and hold the F2 key. Then use.OLD as the prefix to alter the name of your preferred folder.
These are the locations and folders to be named again:
- C:Program Files (x86)Common FilesIntuitEntitlement Clientv8
- C:Program Files (x86)IntuitQuickBooks POS XX
- C:ProgramDataIntuitQuickBooks Desktop Point of Sale 18.0
- C:UsersPublicPublic DocumentsIntuitQuickBooks POS XX
Whenever you install QuickBooks, it automatically generates a QBPOSDBSrvUser window user. Do not forget to remove the user before installing QuickBooks Point Of Sale once again.
Follow the given steps to delete the QBPOSDBSrvUser window user:
- Open the control panel of your window.
- Enter the “user account” and choose the option called “manage another account.”
- Select Continue within the User Account Control Window.
- Choose QBPOSDBSrvUser and delete it.
- Allow the deletion of the folder and start the QB POS computer once more.
Step 3: Install QuickBooks Desktop Point of Sale Once More
- Download and install QuickBooks Point Of Sale (you can skip this step if you already have it.)
- Click twice on the executable file of the POS.
- Overwrite to extract the files that have already been removed if it pops up during its installation.
- You will notice the installation wizard on your screen, select each favorable option and press the yes, next, or the ok option.
- Enter your QuickBooks License Number and the product number with no spaces, dash, hyphens, or underscores as none of them are allowed to use.
- Pick the mode in which you wish to install and optimize QuickBooks Point Of sale.
- Select the single user mode if you prefer to use it in a single computer system.
- If you use QuickBooks POS in more than two computer systems, make sure you choose the multi-user mode.
- Reboot your computer system after installing the POS to run QuickBooks POS.
Click here more information > QuickBooks Error 176104
How Can You Activate QuickBooks Desktop POS?
It is necessary to activate QuickBooks POS each time your download and install QuickBooks POS to access and generate company files. When you open QuickBooks Point Of Sale, you will notice a form appearing on your screen where you have to punch the last digits of your business’s contact number and also the address of your business that you use while purchasing QuickBooks Point Of Sale. You will receive the online registration form if you have an active internet connection. Otherwise, you may end up with the validation code.
Conclusion
We hope you can now use your QuickBooks POS hassle-free and QuickBooks POS Error 176103 exists no more. However, suppose the solutions mentioned above could not help you resolve this issue. In that case, we strongly recommend dialing QuickBooks Customer service at +1-860-813-7413 and get in touch with AskOfficial team who would help you resolve your QuickBooks-related problem in no time.
Frequently Asked Questions
Can I Change the Product Number or Validation Code After Activation?
No, once QuickBooks Point of Sale is activated with a specific product number and validation code, it cannot be changed. Make sure to enter the correct information during the activation process.
Can I Use the Same Product Number and Validation Code for Multiple Installations?
No, each installation of QuickBooks Point of Sale requires a unique product number and validation code. Using the same credentials for multiple installations is a violation of the software’s licensing agreement and may lead to activation errors.
I Have a Genuine Product, But I’m Still Getting Error 176103. What Should I Do?
If you have a legitimate and authorized product but are still encountering the error, double-check that you are entering the correct product number and validation code. Typos or mistakes can lead to activation issues. If the problem persists, reach out to customer help.